
Since release 1.2022.8 it is now possible to work with layouts. So you can now design the columns, orders, and widths, just like you do in maker.powerapps.com. See Microsoft Learn: Edit public views from a table.
Settings 🔗
You activate this in the Settings:
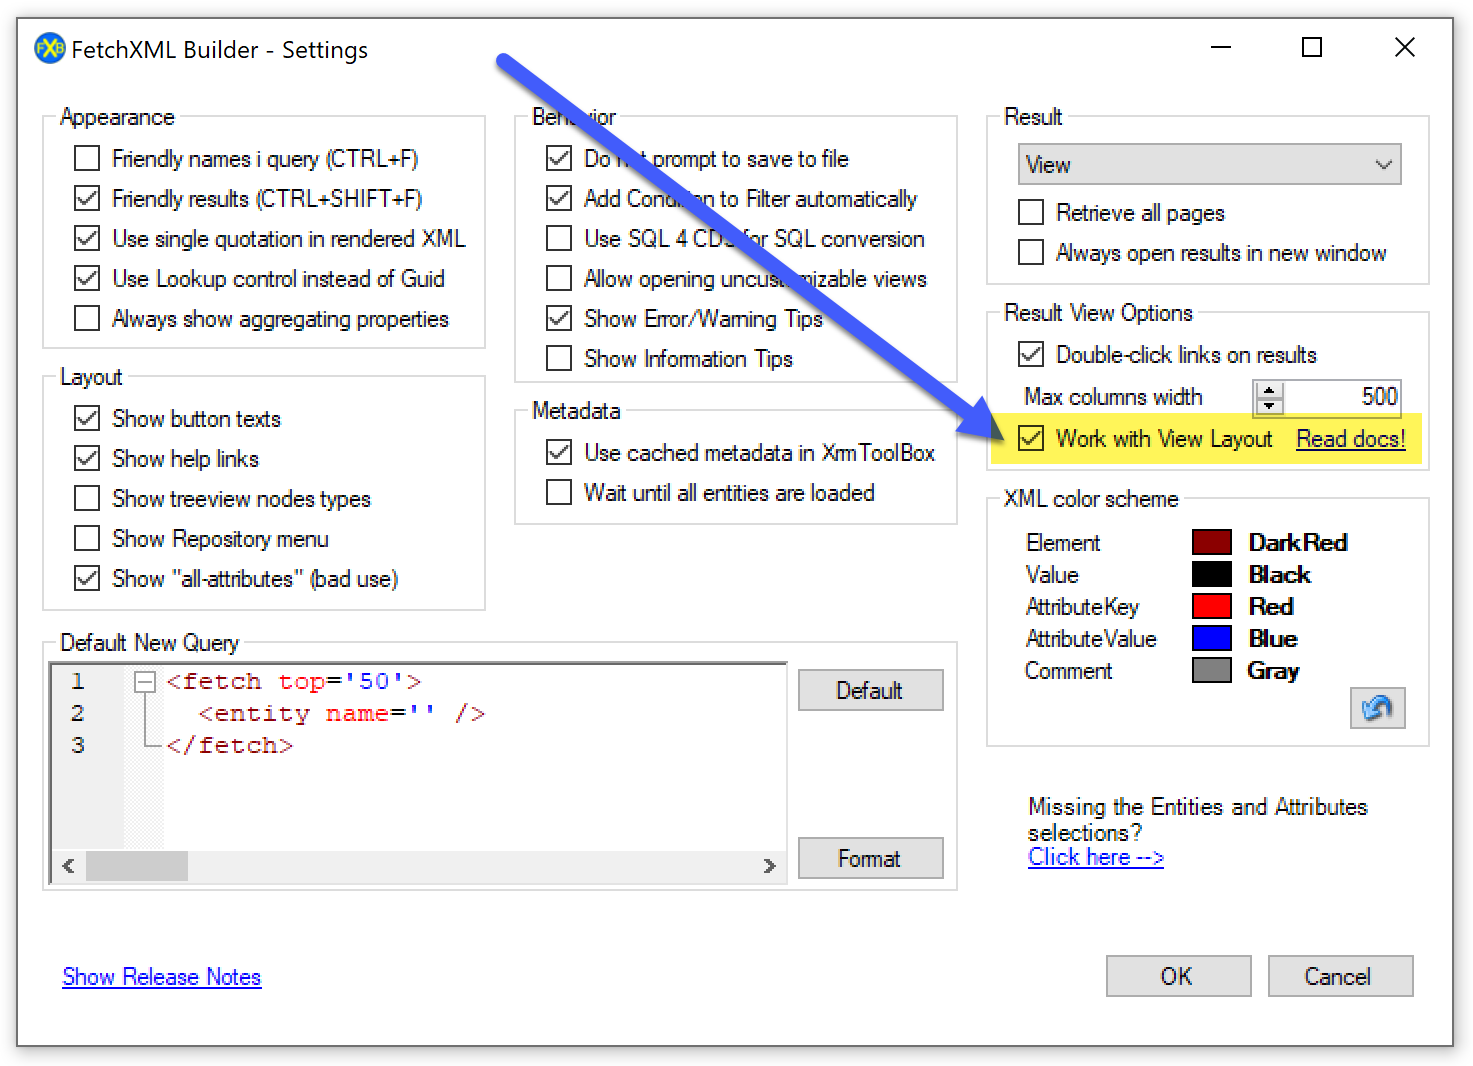
When the Layouts is active, you can not anymore select a few special columns in the Result View, but you can now Reset the layouts:
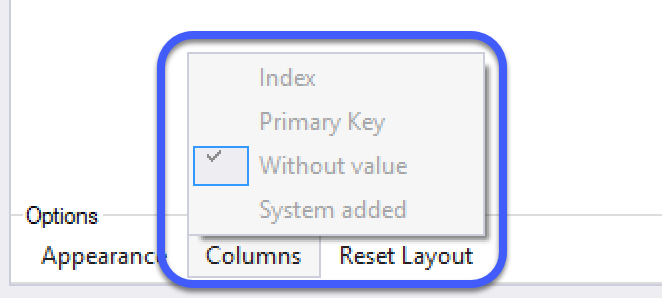
These options can be set in the down-left corner of the Result View. Un-check in the Settings will return the “normal” functionality, just as before.
Tips / Warnings 🔗
From release 1.2022.11 there are a few warnings, where there are some things that do not really work with Layouts.
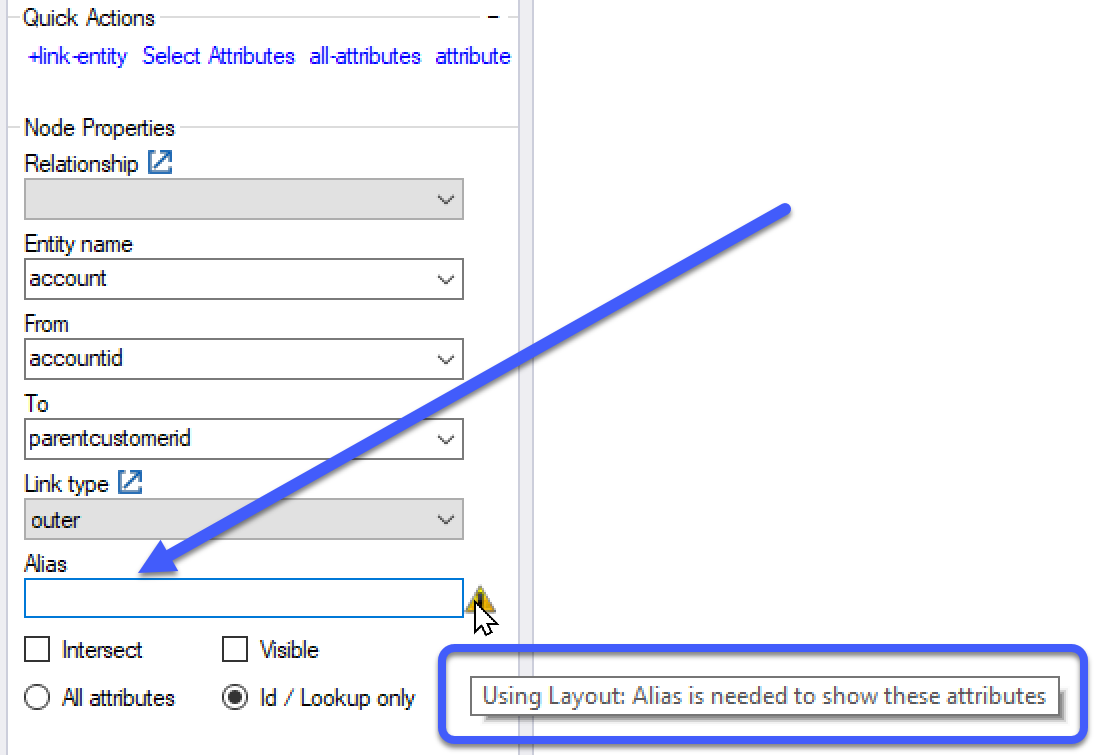
Use Alias on Link-Entity 🔗
I got a bit too many issues, that the results do not show columns from link-entity. Most times, maybe every time, these link-entities disd not have any Alias. It works find to retrieve the results, but it can’t be shown, when this Layouts is active.
Very easy to solve the problem – set an Alias value to the link-entity node.
The warnings will now show you that if you want to see the columns look like this:

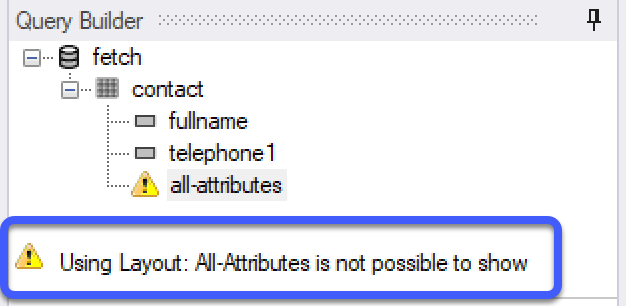
Don’t use all-attributes 🔗
Why should you? You shouldn’t. Period.
But if you do, when the tool has Layouts active, you will not be able to see any columns. Sorry. Live with it.
How to use LayoutXML
To make it really easy: In a view, you have a Name, the Table is used, a query for the data (FetchXML), and finally a definition of how to show columns (LayoutXML). Read all about it here in the docs.
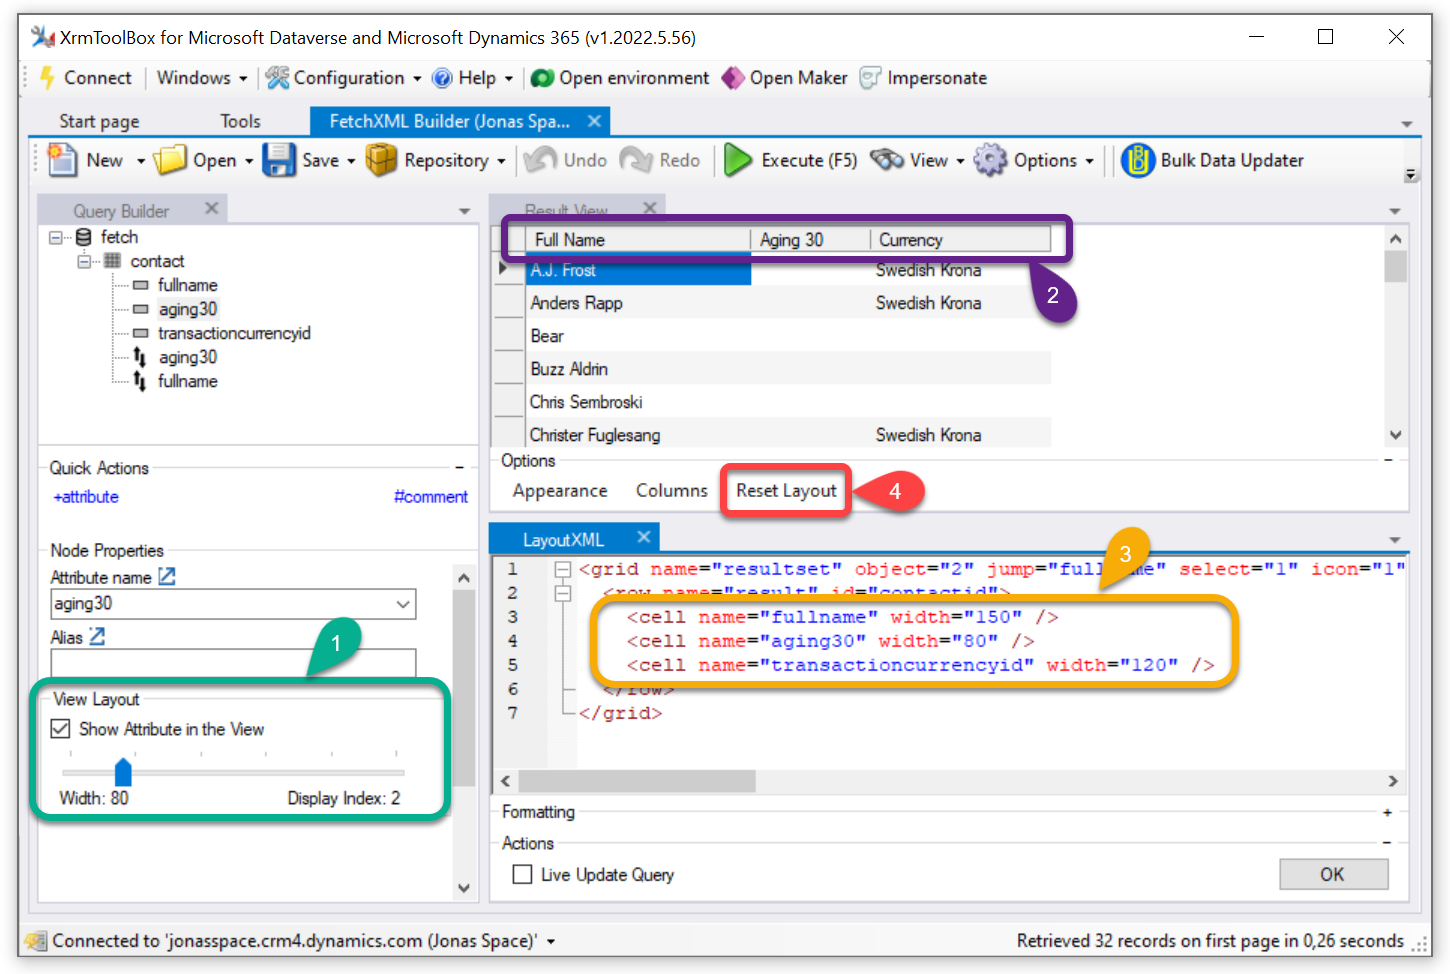
Edit in four different ways
See the screenshot above and the explanations below.
1. The green Attribute box
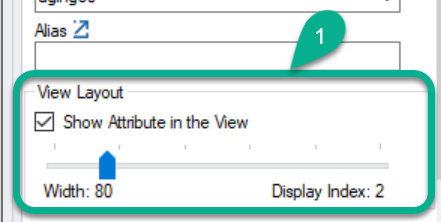
This is for the layout of this specific attribute.
Set if to show it or not. Set the width.
It will show which index number of this column. It can be changed right here though, read on to see where you change the orders.
2. The purple Result View

In this Result View, you can reorder the column, and you have been able to change the widths for many years in this tool.
You use it as usual, but now you can save the layouts to the views in Dataverse. Just drag-drop-clickety-click and save!
If you drag the width to a minimum, the column will now be removed from the displayed cells in the layout.
3. The orange LayoutXML core
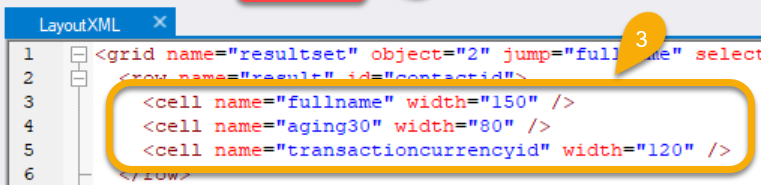
This is the core of the techy folks. The code. The XML of the layout.
The two first lines are called grid and row. These are always handled by the tool. Don’t edit these lines.
The lines in the orange cells – that’s where it happens… Create new lines, delete them, edit the order of the lines, edit the width number. Either you click OK button when you’re done, or you have clicked the check box “Live Update” and the Result View will automagically show what you wrote.
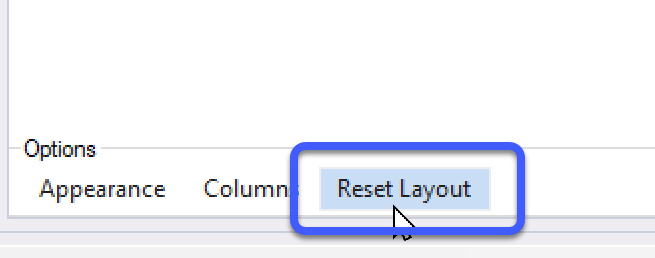
4. The red Reset button

Did everything you did in the Layout or anything else get a bad result?
Click the “Reset Layout” to show it the way it was initially.
Save View
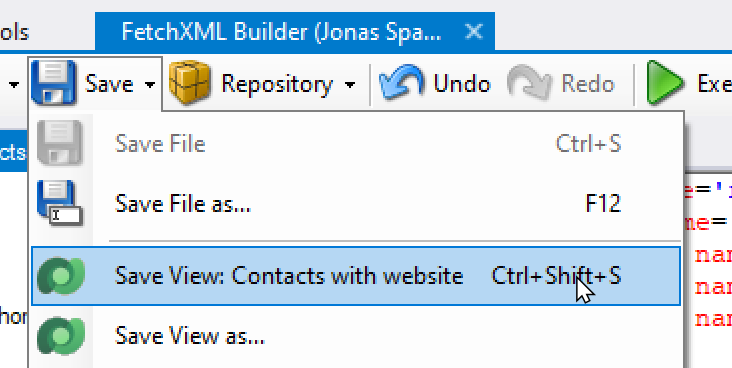
If you have opened a view, it will be possible to save it. It’s been possible for a bunch of years.
To be clear, the name of the opened view is shown in the menu.
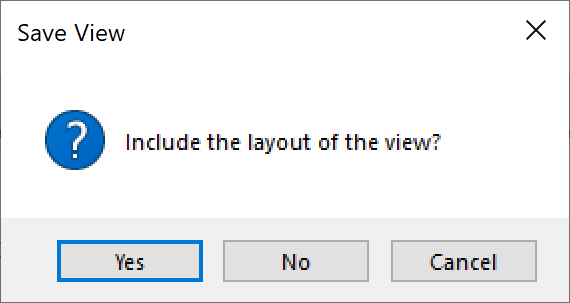
If you have enabled this new feature (in the Settings) then you will be asked if the layout will be included in the update.
Save View As
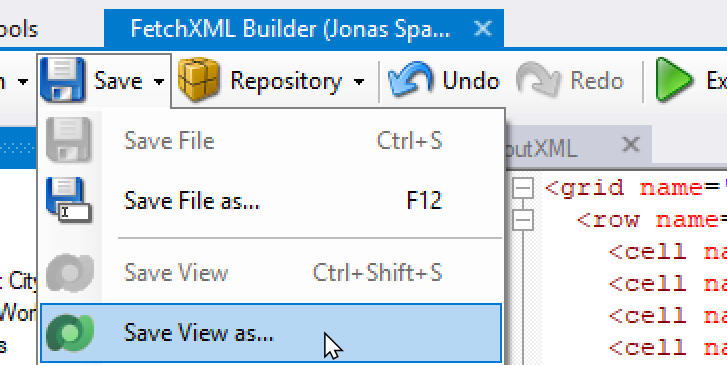
This menu is now always available.
Well, as long as the Settings are correct, the query is supported (not yet aggregate, unfortunately), and the tool is connected to a proper database (Dataverse, Dynamics 365, Dynamics CRM).
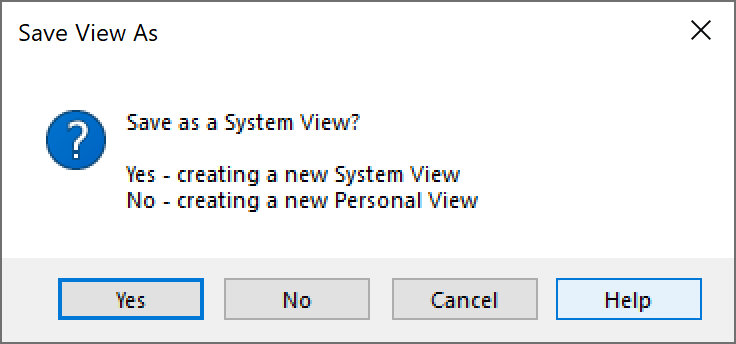
The first question is whether to create a system view or personal view.
System views are possible to save in solutions, and are available to all users (or limited by security roles).
Personal views will only be available to you and may be shared with other users in the Model Driven Apps.
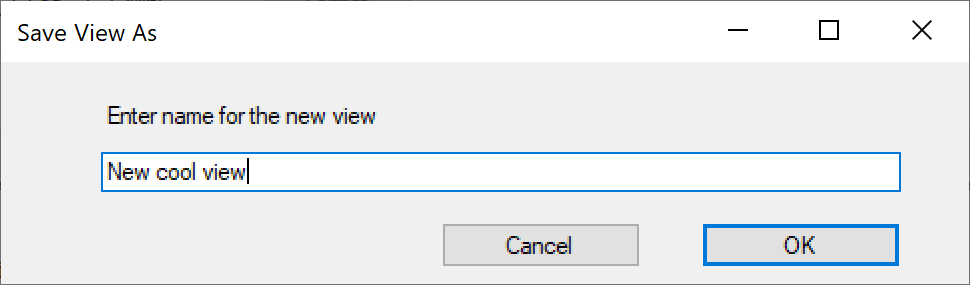
Finally, the name of the view should be added.